Automated Production Installation
This section describes how to perform a quick install of Nodeshot on Ubuntu / Debian systems.
Warning
This procedure has been tested on clean installs of Debian 7, Ubuntu 13.10 and Ubuntu 14.04 LTS.
If you try it on a server where other applications are running you might incur in some errors.
The most typical would be having the port 80 already in use by Apache.
In that case, you should consider using the Manual Production Installation procedure in order to install according to your needs.
Prerequisites
First of all, we need to install the Fabric Python library.
To install fabric, you need to have pip installed on your system. See how to install pip first.
Proceed to install Fabric:
pip install fabric
More detailed instructions about Fabric installation can be found here.
Download nodeshot-fabfile
Download the archive:
eg:
wget https://github.com/ninuxorg/nodeshot-fabfile/archive/master.zip -O nodeshot-fabfile.zip
unzip nodeshot-fabfile.zip
rm nodeshot-fabfile.zip
cd nodeshot-fabfile-master
Alternatively you can use git:
sudo apt-get install git
git clone https://github.com/ninuxorg/nodeshot-fabfile.git
cd nodeshot-fabfile
Start installing
Warning
We suggest to install on a clean virtual machine
Start the fabfile script with:
fab install -H <remote_host> -u <user> -p <password>
<user> should be either a sudoer or root.
The install procedure will start, asking you to insert the parameters that will customize your nodeshot instance:

These are the informations you will have to supply to the install procedure:
Install directory: the directory where Nodeshot will be installed ( default: /var/www/)
Project name: the name for your project (default: myproject), avoid using nodeshot, test, or other existing python packages or the installer will break
Server name: the FQDN of your server (no default)
Database user: postgres owner of Nodeshot DB (default: nodeshot)
Database user password: password for postgres owner of Nodeshot DB (default generated randomly)
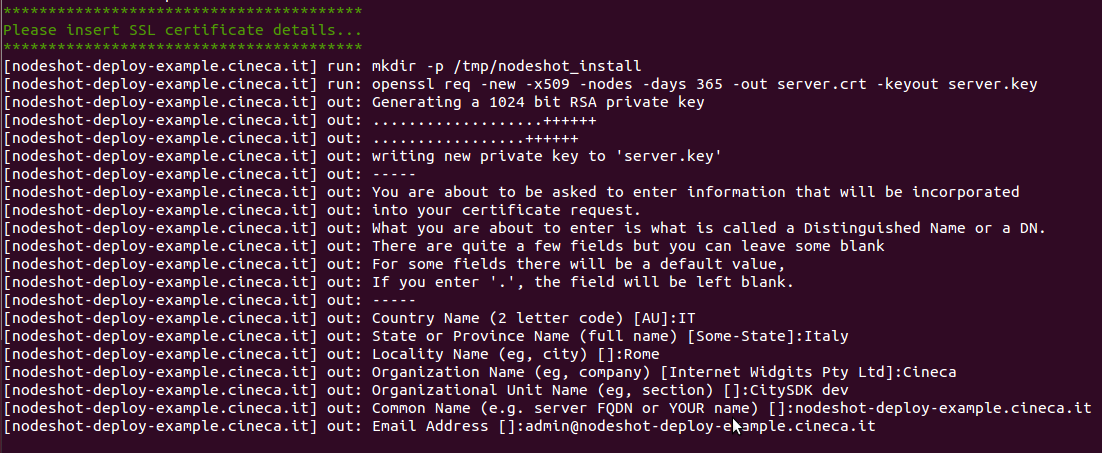
Next, you will have to supply the details for the SSL certificate that will be used for serving Nodeshot over HTTPS:
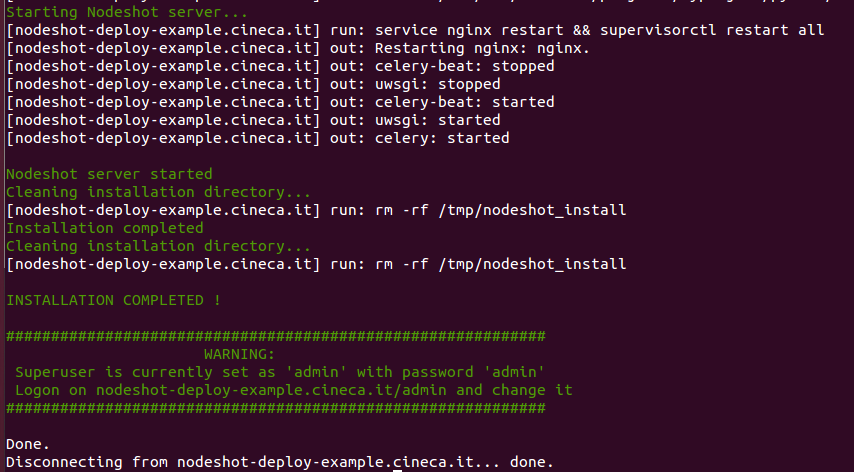
That’s all you have to do: the installation process will start.
It will take care of installing package dependencies, creating a python virtualenv, configuring the webserver and the all the other bits needed to run Nodeshot.
The installation will take about 5-10 minutes to complete. As final step, it will start all services and leave you with a full running version of Nodeshot.
A message will remind you to change the default admin account password:
Updating an existing instance
To run an update do:
fab update -H <remote_host> -u <user> -p <password>
If you need to specify parameters without the need to be prompted do:
fab update:use_defaults=True,project_name=<project_name> -H <remote_host> -u <user> -p <password>
You could also set a different root_dir with:
fab update:use_defaults=True,root_dir=/custom/path/,project_name=<project_name> -H <remote_host> -u root -p <password>